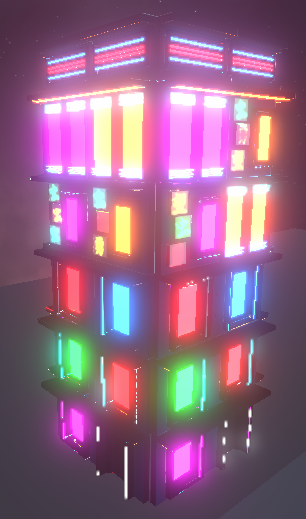
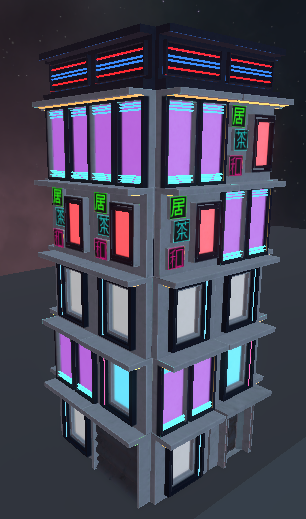
Building Shader
-
Blender Geometry Nodes
Modular Design in Blender Geometry Nodes to create buildings
-
Substance Painter
Buildings Textured through Substance Painter
-
Shader Graph & C#
C# Used for transition logic using Shader Graph for the final appearance
These buildings were a fantastic way to learn about draw calls and material optimisation using a modular building set. These were used in a larger group project for the unity shooter which you can find here:
Building Generation
The first stage of building generation took place by modelling each individual ’tile’ so that they could be joined together to form a building using Blender’s Geometry Nodes.
These ’tiles’ were textured in Substance Painter, and geometry nodes were applied to ensure variation. By adjusting the height, width, and seed values, I was able to randomize the size and position of each tile, ensuring no two buildings looked the same. This method allowed for fast, efficient iteration, significantly speeding up the process compared to manually modeling each building.
Building Implementation #1
With the buildings now implemented into the game, my next challenge was ensuring the player remained visible when obstructed. While various techniques are used in games, I developed a solution using HLSL and C#. I attached a transparent cylinder to the camera, and when it interacted with the buildings, any object that collided with the cylinder would turn transparent, allowing the player to stay in view. Whilst this method worked relatively well, this was my lesson in understanding optimization and the use of draw calls in game engines. Each building had over 10 materials attached, so the shader needed to loop through all of them to make them transparent. As you can imagine, this approach was far from efficient!
Building Iteration #2
This new iteration made use of vertex colours to drive the material. By assigning different vertex colours to each wall section, it meant I could mask out specific sections of the wall in Substance Painter and use different material for each vertex colour. This resulted in a far more optimised design, significantly reducing the number of draw calls down to 1 Material, compared to 10.
Doing this also meant I could refine the colour palette and aesthetic of the buildings to match the intended art direction, resulting in a far more optimised design and a much better looking building.


Building Implementation #2
With the newer more optimised buildings added to the game, they required a more stylized aesthetic to match the vibrant look of the buildings. Performing a raycast on one material was significantly easier than 10+ so it introduced a range of more interesting effects. Here you can see the first prototype when the player goes behind the building, it turns transparent with a futuristic type look.
Expanding further on the prototype, I landed on a composition of elements in the shader which I felt suited the aesthetic of the game. I Included a glitch effect, offseting the world position of the mesh at random points using a series of noises. In addition, the use of gradients, dithering and emissive colours were also incoporated, capturing the cyberpunk vibe whilst ensuring the player still remains visible. This felt like a significant improvement both in performance and aesthetic and I’ very happy with the outcome.
These buildings were apart of a larger group project which can be found here:
